 fujiposts
User Guide
The app has four tabs: Camera, Library, Recipes and Settings. A photo is one tile; tapping it opens everything you can do to it.
1. Set up the camera
Once per camera, on the camera's network/USB setting tab (MENU/OK › the tab with the network icon):
- USB POWER SUPPLY/COMM SETTING › AUTO
- CONNECTION MODE › USB RAW CONV./BACKUP RESTORE (USB MODE on older bodies)
Camera › Connect with a cable shows these steps with pictures. Menu names differ slightly between bodies.
2. Connect
- Switch the camera on and plug it into the iPhone or iPad with a USB-C data cable (1 m or shorter; a charge-only cable carries no data). Unlock the phone if iOS asks about the accessory.
- Open fujiposts. The Camera tab finds the camera and runs four checks: Camera found, Allowed, Connection mode, Accepts recipes.
- The first time, iOS asks to allow fujiposts to use the camera. Tap Allow; the app uses this only to talk to the Fujifilm body. If you refused, open iOS Settings › fujiposts and turn Camera on.
- When the card reads "X-T5 is ready", tap Open Library. The camera is saved and recognised next time.
3. Import photos
Library › + (Import):
- Photos library: pick RAFs that are already in Photos (from the Fujifilm XApp or AirDrop). They are copied into the app; no Photos permission is needed.
- Files: pick a folder, for example the DCIM folder of an SD card in a card reader. The folder stays a source and is read in place, so keep the reader plugged in while you develop.
A folder that is not available (the reader unplugged) shows as a note with Remove. The RAF must come from the connected camera's model; a file from another body is refused before anything is sent.
4. The Library
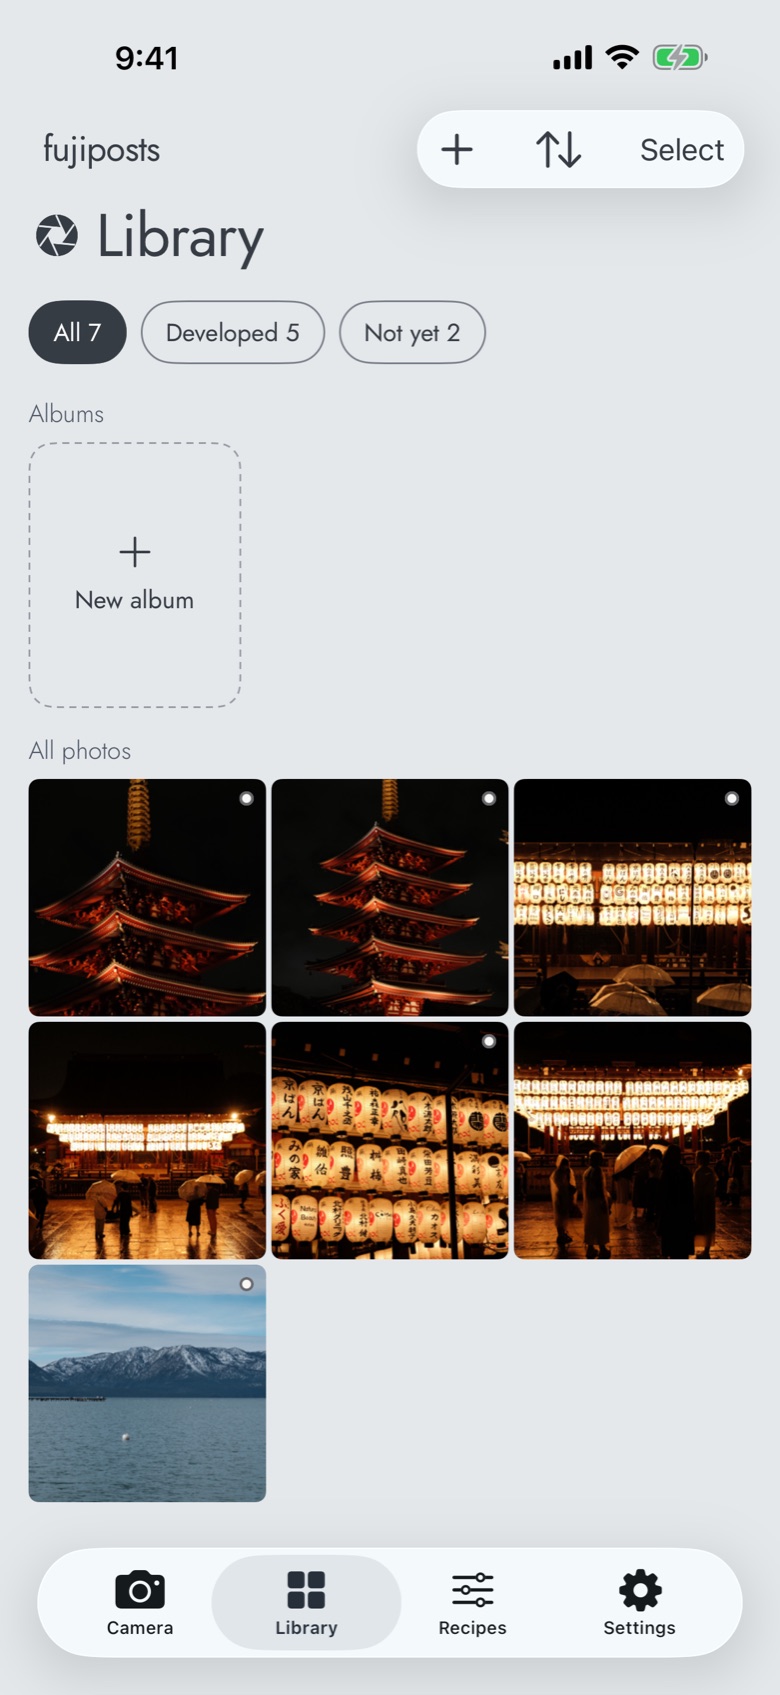
One tile per photo, showing its latest look: the RAW's preview, then the camera's render, then the framed copy. A dot marks a photo the camera has rendered. The chips All · Developed · Not yet filter; Sort orders by date or rating. Albums are optional collections: add a photo from its long press, a selection or its Info; an album can be reordered and exported as one set.
A tap opens the photo. A long press offers Share, Add to album and Info. Info shows the file, exposure, the recipe it was developed with, the settings it was shot with, and Save as a recipe.
5. Edit a photo
The Photo screen has a strip of five tools: Recipe · Crop · Border · Text · Slides. Every change is kept the moment you make it; Back always leaves things as they are, and nothing is written until you Share.
Recipe: develop on the camera
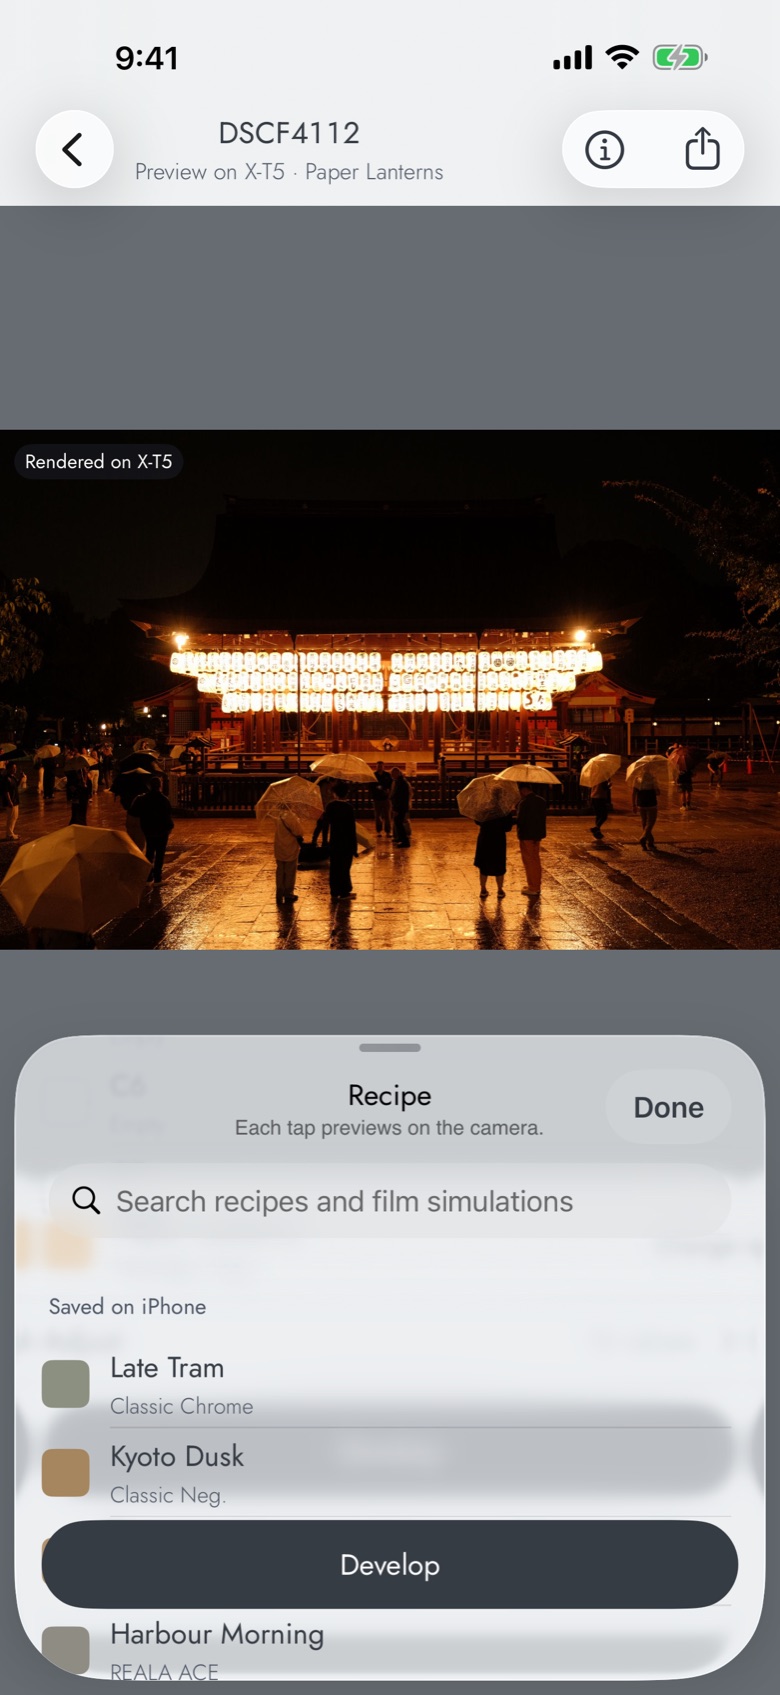
Pick a recipe, a film simulation, or As shot. With a camera connected, each tap previews on the camera in a few seconds. Adjust lets you change any value for this photo (highlight and shadow tone, colour, grain, white balance and so on; the app only offers what your body supports). Tap Develop to render full size; the screen then reads "Developed on X-T5". The first Develop on a real camera opens the Pro paywall.
Crop
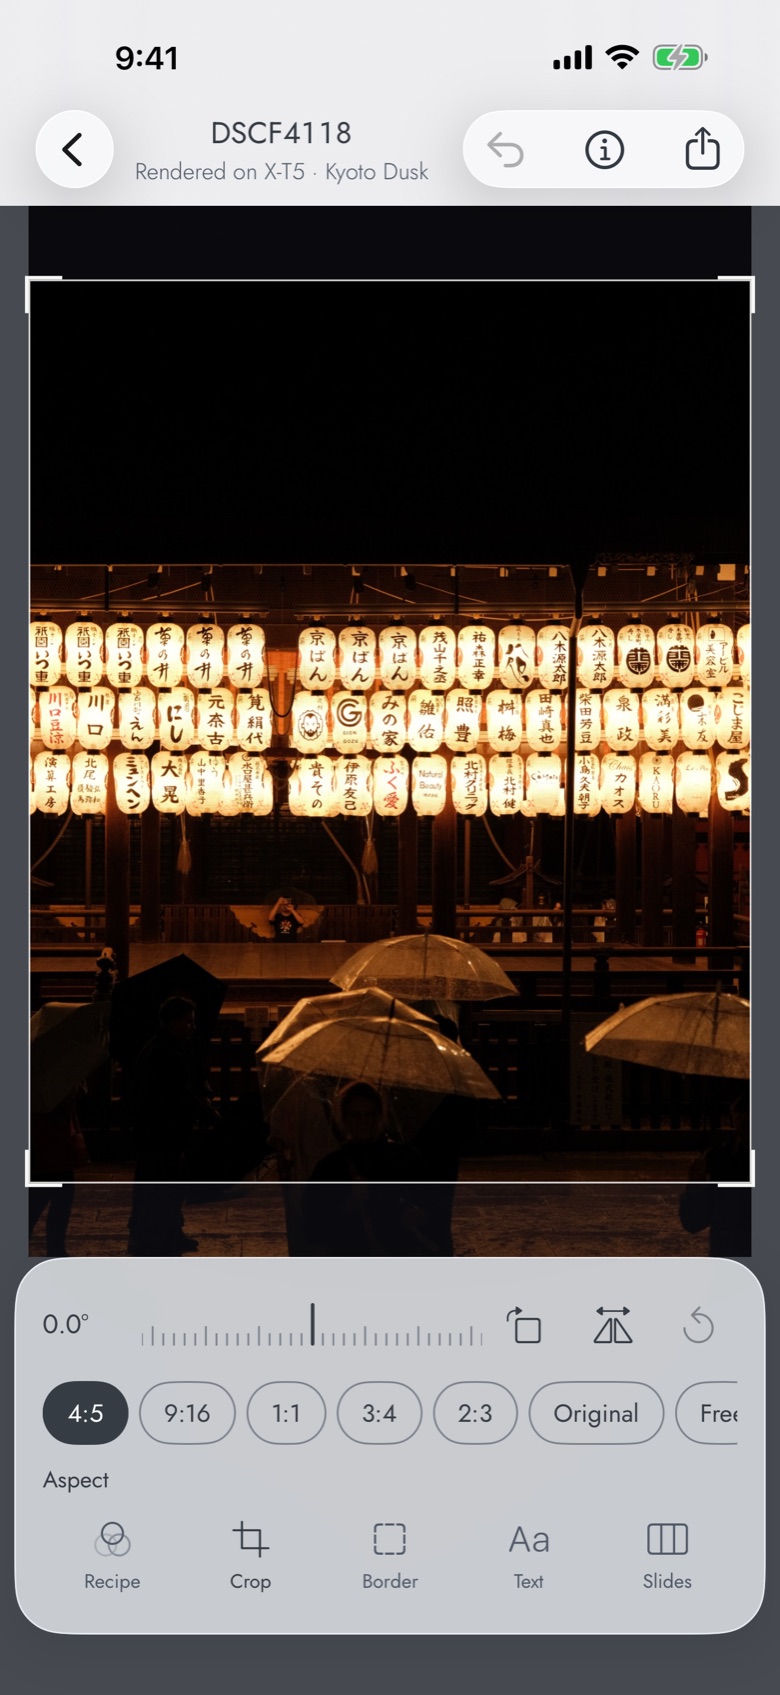
Aspect presets (Instagram's among them), free crop, straighten, rotate 90°, flip, and Reset. A crop made before developing applies to the render when it comes.
Border
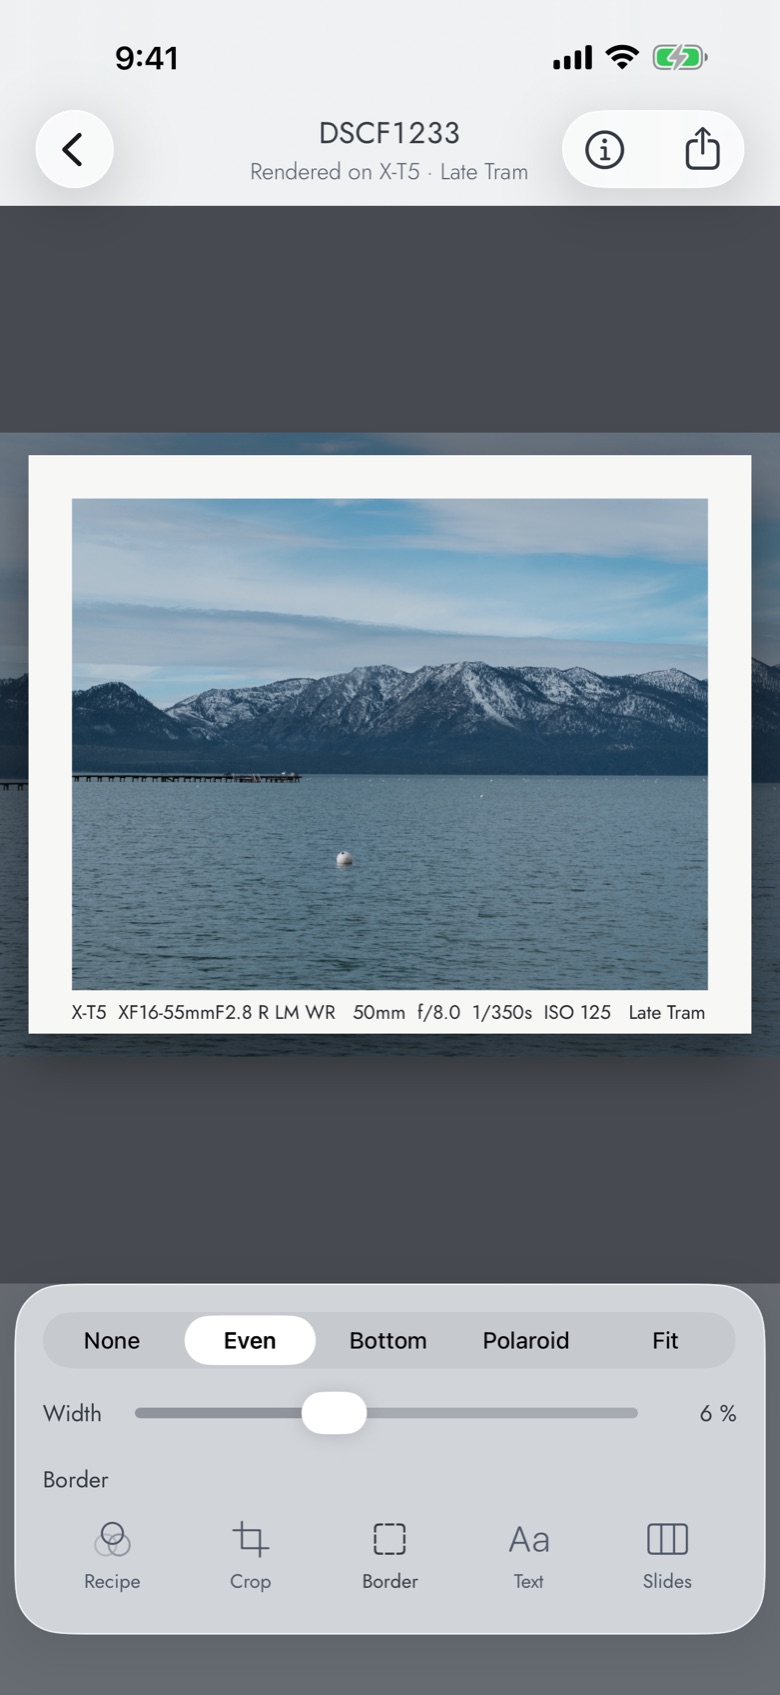
A print mat on paper: None, Even, Bottom, Polaroid or Fit, with a width slider. Border, text and signature choices are remembered for the next photo.
Text
A caption on the border from the file's own data: recipe, camera, lens, exposure, place, and your signature (Settings › Prints › Name on prints). Line or stacked, left, centre or right, four typefaces, a size slider. Edit text… lets you change any line; Use photo location looks up the place from the photo's GPS when you tap it.
Slides
Split a wide photo into 1, 2 or 3 carousel slides of 4:5, with Full photo first to add the whole picture as the cover.
6. Several photos at once
Library › Select, tick up to 20 photos, tap Develop N photos, pick the recipe once and Develop. The camera renders them one after another, in the foreground with the screen kept awake, about five seconds each on the X-T5. When it finishes the photos stay ticked, so Share N photos is the next tap: they are framed with your remembered border and text, and you only open one if you want to crop it. Edit N photos opens them as a batch with a filmstrip, so one border and caption goes on all of them.
7. Share
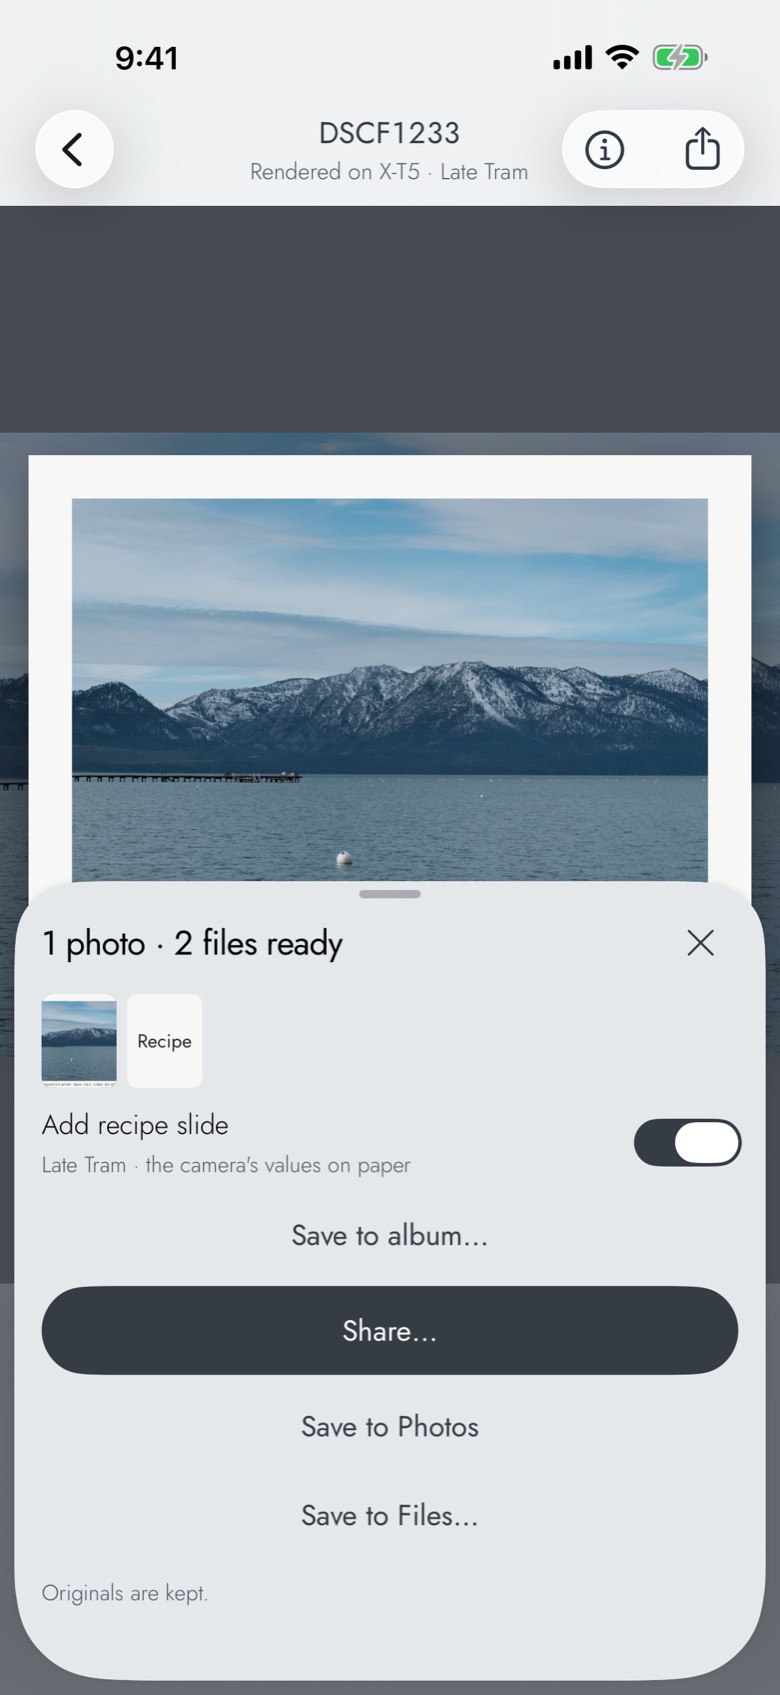
Share (the arrow in the bar, or Share N from a selection, or an album's Export all) makes the framed files now and opens the sheet:
- Add recipe slide: a 4:5 slide listing the recipe's values on paper, placed after the photos that used it.
- Share…: the iOS share sheet. For an Instagram carousel, choose Instagram here; the slides are already cut to 4:5 and in order. Instagram takes 20 files at most.
- Save to Photos: into a Photos album named after your album.
- Save to Files…: numbered in export order, 01_DSCF2564_framed.jpg, slides as _1of3.
Every file is full size with the camera's metadata kept. Originals are never changed.
8. Recipes
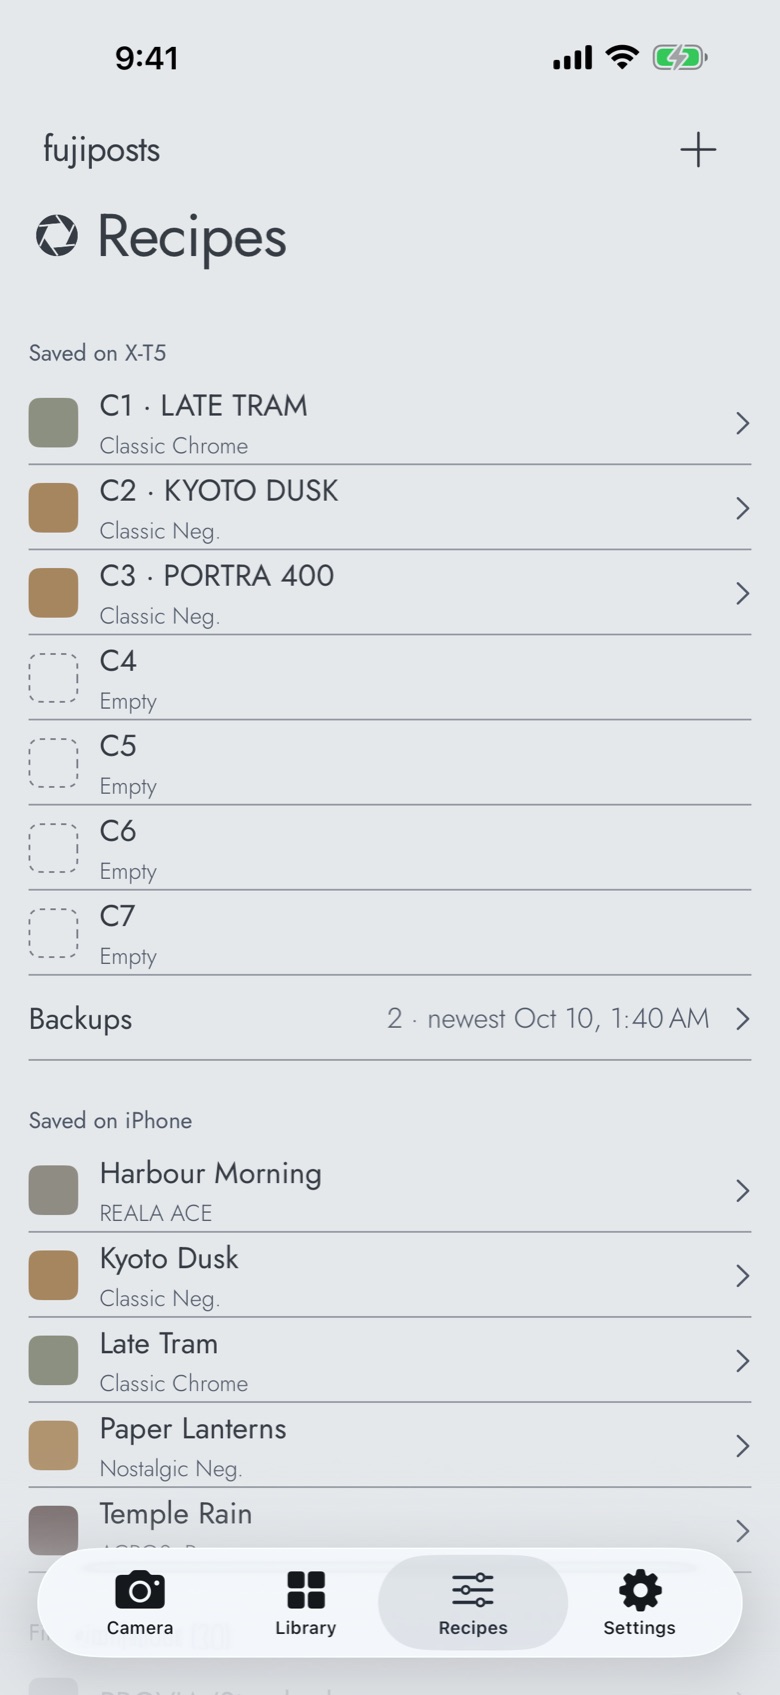
The Recipes tab lists Saved on X-T5 (the connected camera's custom settings C1–C7, read when you open the tab), Backups, Saved on iPhone (yours), and the 20 film simulations at camera defaults.
Add a recipe
- + › New recipe: name it and set each value in the camera's order.
- + › Import from screenshot: pick a screenshot of a recipe; the text is read on the device and the lines it could not read are listed for you to check.
- + › Paste text: the same, from the clipboard.
- Share to fujiposts from Instagram, Safari, Photos or Notes: the share sheet's fujiposts item imports an image, text or a link.
- Save as a recipe from a photo's Info: the settings the photo was shot with.
Write to the camera
Open a recipe › Write to X-T5…, choose a slot C1–C7, tap Write. A backup of all seven slots is taken first, and the toast offers Undo. The name on the camera is the recipe's name in capitals (25 characters at most). Dynamic Range Auto is written as DR100, since Auto cannot be set over USB. Writing needs Pro.
Backups
Camera › Back up camera settings saves C1–C7 as they are; the app also backs up automatically before every write. Open a backup to Keep it (never pruned, and synced if iCloud sync is on) or Restore it to the connected body. Settings › Recipes › Export recipes to Files writes all your recipes as one file; Import recipes from Files reads it back.
Tell a recipe
A recipe's screen has Share…, which sends it as text, and the Share sheet's recipe slide puts it on a picture.
9. Settings
- Appearance: System, Light or Dark. iCloud sync: recipes, kept backups and frame choices, through your own iCloud. Language.
- Prints: the name printed as your signature.
- Pro: your plan, and Restore purchases.
- Cameras: the saved bodies; swipe to Remove.
- Help: the connection guide, Report an issue (an email to support), Rate.
- About: version, licences, Privacy Policy and Terms of Use.